Well, those projects are FINALLY COMPLETE and it's time to chronicle the process for posterity (but mostly my own memory).
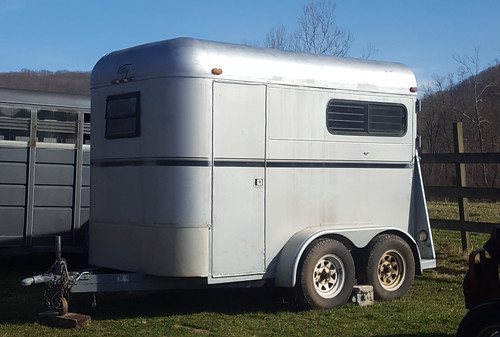 |
| The before, variability in the paint color/thickness not as evident in this photo |
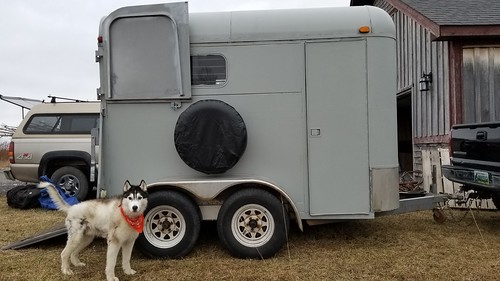 |
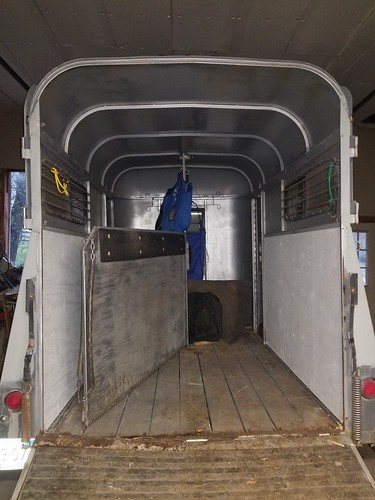
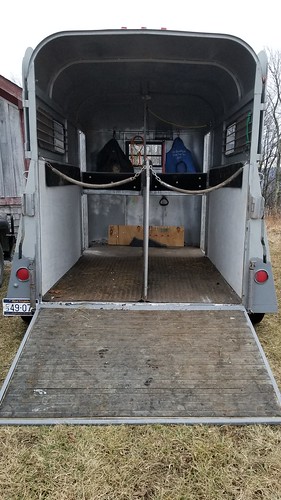
| After, (inside of Dutch door still awaiting fresh paint; winter arrived and stalled painting process) |
A Bit of Buyer's Remorse & Steps Toward a Solution
When I purchased this little trailer in February, I knew it would need a little work over time. By and large though, for a 23 year old trailer, things looked great. The floor was in phenomenal condition and the frame was super solid with very mild surface rust after so many years. These two things are very important to consider when purchasing a used trailer, so knowing they checked out was important to me.However, to help guarantee further longevity of the trailer, I was prepared to do some critical maintenance work. Primarily, buffing of rust and application of a fresh coat of paint to slow the inevitable rust process that occurs on the east coast due to rain, humidity, snow, and salty winter roads. I've got lots of experience buffing and painting after numerous DIY projects through the years, so this seemed very doable.
Except after the joy of the initial purchase wore off and I looked at the trailer with fresh eyes, I realized I missed one thing...
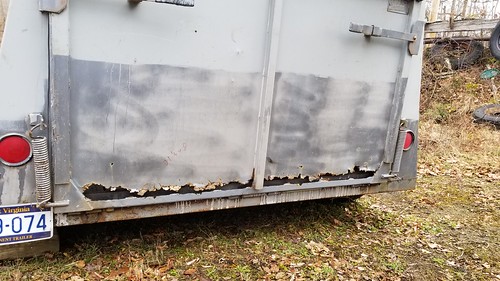
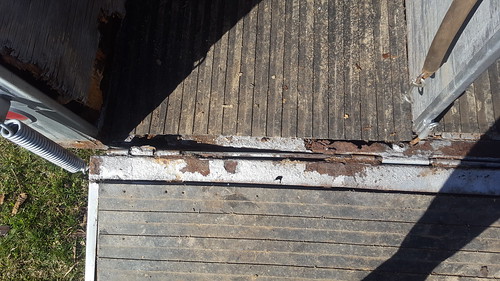 |
| From above, you see the rust but the issue isn't that evident... |
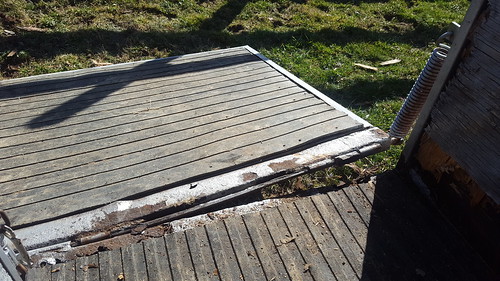 |
| But from this angle, which accentuates the problem best, you can definitely see the problem! |
Yeah... That ramp definitely shouldn't be that way!
I beat myself up about it for a little while, but realized that it was just a learning experience that I needed to get through. As my BO has told me time and time again for various situations that I fret about, "Worse things have happened to better people." Or, in other words, it's not a big deal, calm TF down.
And so I set to researching what exactly needed to happen to correct the issue and then began seeking help. Right away, I was guided to our local high schools shop classes. They're always looking for learning projects. The work won't be the quickest or the prettiest, but the labor will be cheap. With an older trailer, I already accepted that pretty wasn't necessary, so I dropped the trailer off.
Well, long story short, they never got to the trailer before the summer break. They told me to bring it back in August and it would be their first thing, but I was Over It at this point.
Fortunately, my neighbors jumped in at this point and let me know that our friend Chuck was a very skilled welder and could do the job for me! Excellent. Except, well, if you know Chuck (and really, if you know any Canaan Valley person), you know things don't happen quickly.
I just accepted this slowness for what it was and didn't let myself worry about it. I knew he WOULD get to it and he WOULD do a good job and it would probably(?) be done before the end of the calendar year.
While I waited, I was cautious about hauling and loading and unloading my horses if they were on that side. I'm very fortunate to have horses who are very good about trailering and knew that for a limited time, things would be okay so long as I was conscientious about unloading them as that was the only time that cattywompus ramp could really cause an issue as there were no sharp edges exposed, it was mostly just a trip hazard in the interim. And honestly, for my horses that were used to a step-up trailer, that little 2-3 inch warped ramp area was nothing.
But First, A Fresh Paint Job
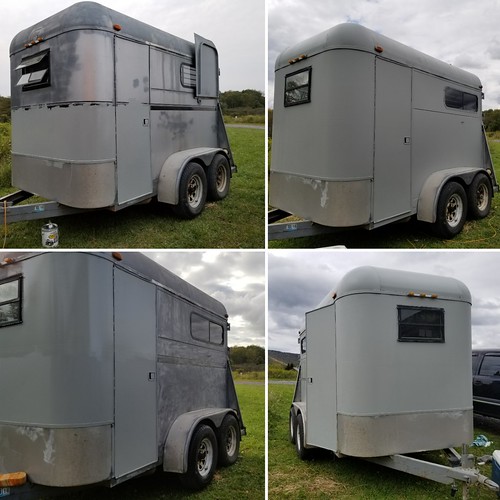
It's not evident in many of the above photos, but the paint was irregular at best. Over the years the owners had spray painted areas of surface rust with a variety of gray-silver paints. While this protected against further rust formation for a temporary period, it resulted in the trailer looking rachety as all get-out.Originally, I figured I would paint the trailer after the ramp was fixed. However, as Chuck was picking away at to-dos with the trailer as they fit in his schedule, he recommended I buff and apply primer on some areas to prepare for the work he would complete.
The weekend I set aside to complete this task corresponded with a beautiful unexpected opening in my schedule - by various strokes of luck, I had NOTHING scheduled.
So, logically, I bought a gallon of primer and decided to "see how far it would go".
Result? Basically the whole damn trailer!
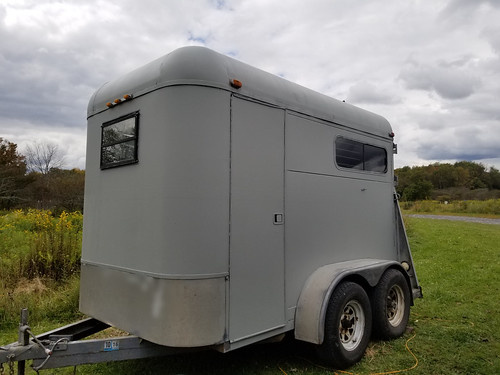 |
| Not the most professional of all paint jobs, but way better looking than before! Now it needs a navy stripe and some reflective tape accents to help with night time visibility. |
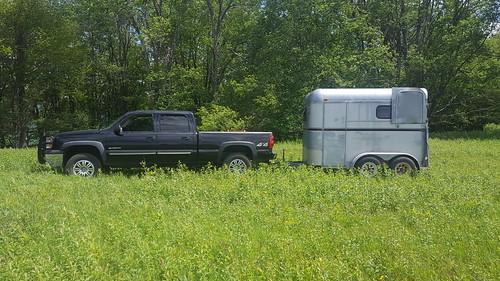 |
| Irregular paint evident here... |
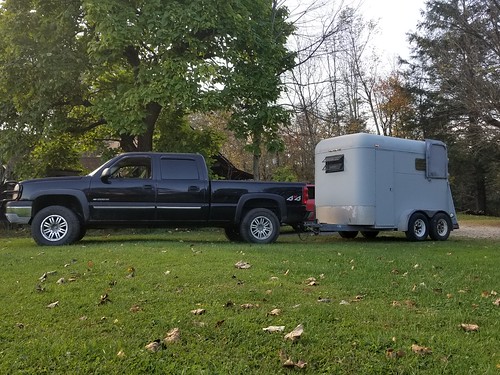 |
| Ah, much more uniform and well protected for several more years against oxidation-reduction - an inevitable process you must be prepared to battle when you live in the wet & snowy east! |
I even clambered up onto the roof like a responsible painter and put the requisite coats on it!
The only place I didn't buff and paint was the base of the trailer ramp where I knew more work would be done.
It was a ton of work, I won't lie. Buffing the damn thing was the hands down WORST, but good tools and sheer determination helped me get the job done. It's not the most professional paint job ever, but it's a freaking 23 year old trailer - any paint job was an improvement at this point and I'm all about form and function before beauty when it comes to these things.
The most important thing is that the trailer now has a good protective barrier to road salt and moisture. Rust will be slower to form for several more years, a good thing when you live where I do!
The Real Work Begins
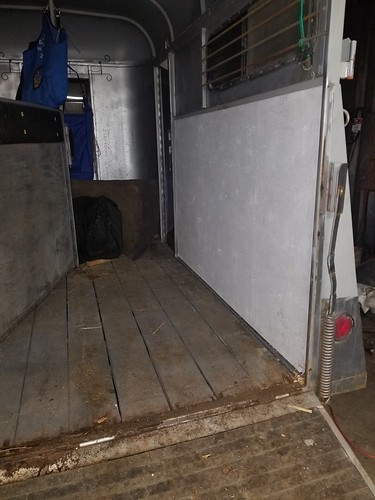
As summer faded to fall and fall cooled down and rained a bit, Chuck's schedule finally lightened to the point where he put my trailer in his shop and began work.First thing was first, patching up the metal along the base of the stalls behind the tires where road salt had eaten away at the trailer.
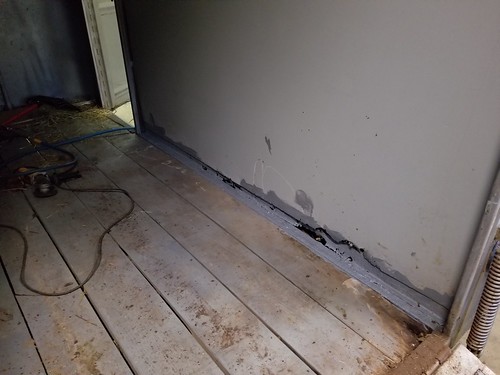 |
| Inside the trailer where the plywood typically sits; bottom of the metal rusted out. |
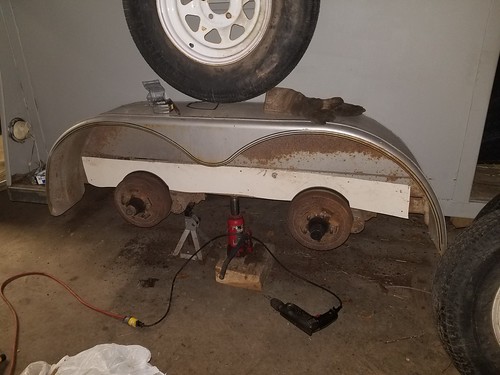 |
| White strip is new metal that was cut, drilled, and caulked to protect this area from future moisture/rust. |
From there, he painted and installed new plywood.
And then took the ramp off to begin working on that whole debacle.
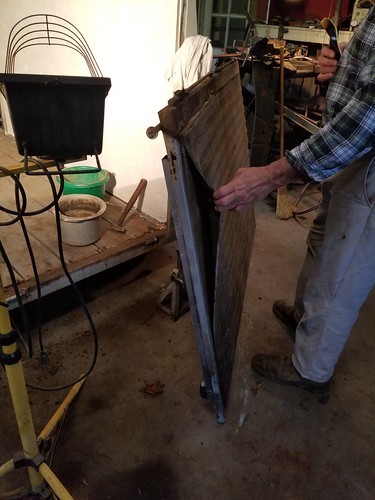 |
| Discussing whether the plywood under the ramp mats would need replaced. Spoiler: it didn't! It was in great shape. |
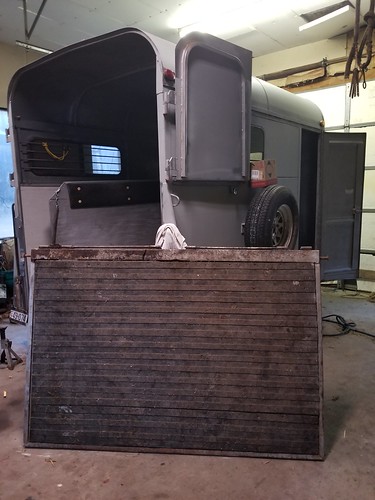 |
| Ah, hello there problem child! |
 |
| Miraculously, the ramp wasn't warped that badly from where the hinge rusted off allowing the spring to pull it upwards and askew from the trailer. |
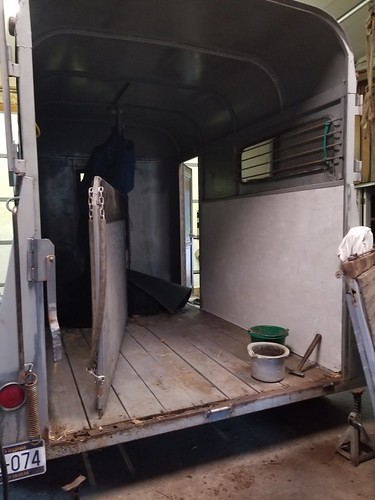 |
| If you look closely, you'll note the left-most hinge missing completely. Lovely! |
Chuck is an absolute WEALTH of knowledge on this type of thing and I enjoyed hearing how the process was going as he set about it. The "hinge" on the ramp was definitely NOT factory-built. It was some sort of repair somewhere in the trailer's lifetime and it was done piss-poor which is why the whole thing ended up the way it was when I got it. Basically someone drove a hexagonal bar through the hinges and called it good. It wasn't done well and resulted in one hinge rusting off of the frame resulting in a warped ramp.
Chuck's repair of the thing put it back to what it should have been - three independent hinges.
Final Steps
Putting the ramp back together was a bit of a process, but not too bad in the grand scheme of things.I first prepped and painted the ramp where the plywood would go to further protect against future rusting, and then we fit the plywood back in, I screwed the mats on, and that was that.
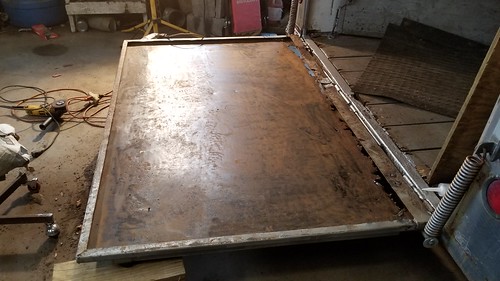 |
| Partially buffed in preparation for paint. |
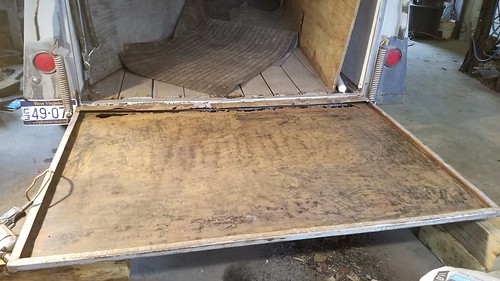 |
| Buff job complete. |
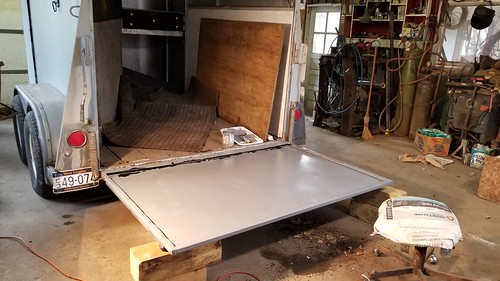 |
| Painting complete. |
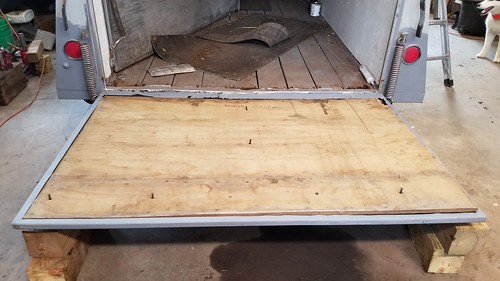 |
| Lining up the plywood to be screwed back in was a bit more complicated than it looks! |
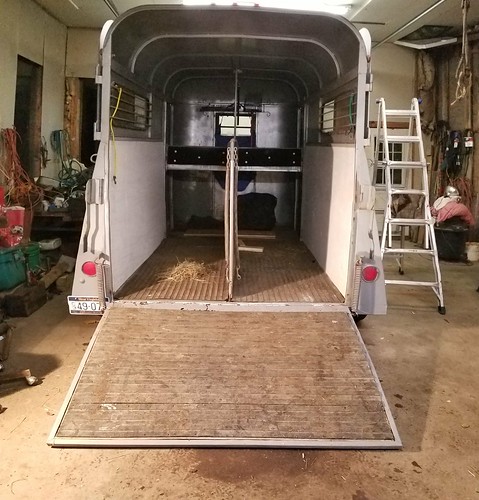 |
| Bada-bing, bada-boom! A STRAIGHT ramp! |
 |
| How lovely this is to look at! |
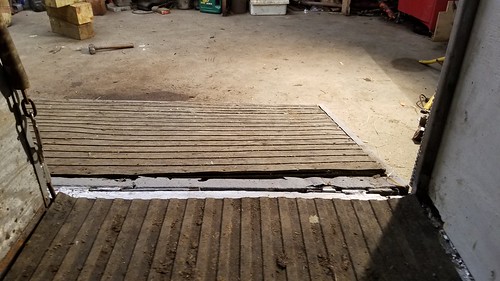 |
| No more rusted off hinge and warped ramp |
We also patched up the sheet metal on the outside bottom of the ramp, too, to protect from further rust damage. Or I guess I can say that I patched up the sheet metal on the outside. Chuck cut the pieces, then instructed me how to caulk them and screw them on.
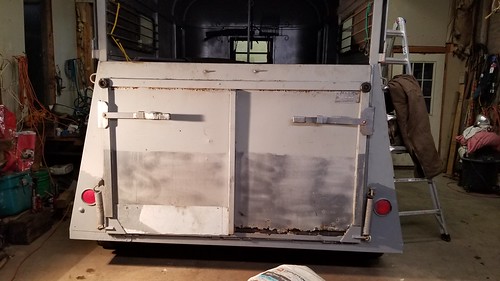 |
| Left side patch caulked and screwed on... |
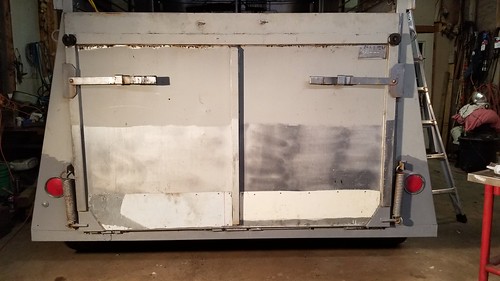 |
| And now the right side! All it need is a final paint job to neaten up everything! |
What a process!
I still plan to add a final coat of paint to the whole thing with a sprayer - and honestly planned to have that done prior to sharing this post - but it will have to wait for warmer weather, which is hard to predict this time of year.
Conclusion
Could I have spent some more money or taken more time to find a better trailer? Absolutely! But you know what? At my price point, I did pretty damn well for myself and even with all of the extra work, I still couldn't have found a nicer trailer within my budget.It was a lot of time and effort to flip this thing into something prettier than it was, but I have learned a TON from the process. And honestly? I really feel like I'm better off for having put in the hard work myself to make so much of it happen. I'm much more familiar with this hunk of metal on wheels and feel good about hauling my horses in it. Additionally, if a day comes that I want to upgrade to a better/bigger trailer, I have a much better grasp on what I'll be looking for and considering. Knowledge is power.
I'm really pleased with how everything turned out. I plan to add some additional minor upgrades to the inside so far as hanging hooks and saddle racks, but that's child's play considering everything else that has been tackled to date. I'm also playing with the idea of painting some fun little caricatures of the horses somewhere, too, we'll see!
: : : : :
Have you ever flipped, renovated or given a facelift to your trailer? I know some of you have shared some blog posts here and there on the subject. I'd love to hear your stories if they haven't been documented yet. Or maybe you've chronicled some trailer improvements already and they're archived in years past on your blog?



Nice job!! It is frustrating when people do a cheap, quick fix instead of just doing ti the right way like you did. That trailer should do well for you for a long time yet.
ReplyDeleteThat's certainly the hope!
DeleteTrailer improvements interest me to no end! I got my trailer for a steal and husband put in a lot of time making it nice inside. This summer we did a "spring cleaning" that ended in us tearing the whole inside apart and painting it the final white color it always should have been. I always love seeing people fix up old trailers. They still have a ton of life in them, and usually old ones are steel ones, which means if you pay a welder (or have one yourself), you can usually salvage an old trailer into something nice!
ReplyDeleteOh NICE! I'm envious that you have a husband with a skillset that enables repairs of all your horse transportation lol. And yeah, as much as I'd love a newer trailer, there price point of well-maintained older ones is much more up my alley.
DeleteIt looks fantastic, great job! You must be so excited to finally have all the pieces cleaned up and ready for action!! Time to start putting stuff on the calendar I think!!!
ReplyDeleteYou're so very right. One dressage lesson tentatively scheduled in January and I need to get the dates for the Loch Moy spring HTs, too!
DeleteI am so happy you posted about this! I'm planning on doing a facelift on my trailer (it's a 1989!) this winter too. You given me some real inspiration!
ReplyDeleteOoh! You'll have to share about your facelift process, too! Love to hear about it.
DeleteI'll have to start with really good "before" pics!!!!
DeleteWhat an amazing project! I am SO SO impressed with your skillz, way to go! Really inspirational, makes me want to go find some crazy hard horsey project and tackle it LOL!
ReplyDelete<3 Kelly @ HunkyHano
Haha, thanks, tho fortunately I've got good professionals that helped on this one - definitely couldn't have done it without Chuck!
DeleteI replaced the floor on my old trailer- well Ed and a friend did. :D
ReplyDeleteYou should be proud of all that you have done. I was fortunate to be able to buy a new trailer 2 years ago. I hope to have it for many many years.
Oohh how nice! I bet you'll have it for a good long while.
DeleteIt looks so good! I redid the back doors on my old trailer, adding plywood and mats to protect them from my rude and angry horse. Also did a lot of paint touch ups. I'd like to say the painting was the worst par, but really that was cutting and dragging the mats. Ugh
ReplyDeleteOohh, plywood and mats to a trailer that didn't have them is a GREAT idea for an angry horse. Cutting them and moving them around is definitely awful though, I second that statement!
DeleteGreat work! I also bought a fixer-upper feeling I could make the improvements. I currently just passed a very panicked "omg, what did I buy" phase and am entering the "calm the F down, I can fix this" phase but not really sure how. There is just sooo much more rust than I recall the day I signed the cheque and it looks like more than painting (like replacing hinges and bits of wall). I can't do anything now because of winter temps but I will have to dig in and do some serious work on my trailer this summer.
ReplyDeleteOh no! I hope a good buffing with a wire brush, some paint, caulking, and screwed on patches will take care of things for you! Welding is definitely the $$$ part, but buffing/painting/patching isn't too bad at all.
DeleteWhen I'm in the trailer market (hopefully soon?), I'm going to be in that same price range, so I love the updates. It's good to know what's possible. :-)
ReplyDeleteHopefully you'll find a better condition trailer so you don't have to dive in like I did, haha. I remember seeing several nice ones in Idaho in my price range when I was shopping...the drive to get them would negate my budget though no matter how fun the road trip would be. It also would have been too much of an excuse to come home with another horse lol
DeleteThat's really impressive. We've done some minor fixes, but nothing this involved. Buying a used trailer scares me; I'm just not up to that much work/risk.
ReplyDeleteYeah, it's definitely not a purchase that comes with as much peace of mind as a new trailer! My reality has always been in the realm of used trailers. Maybe one day I'll get a nice new one, tho I hope to keep this one moving along well for many years.
DeleteYou have no idea how absolutely impressed I am with this. My trailer needed some loving, and help, but I was scared to tackle the project... so I sold it. Well, that and the fact that June hated it. But wow! So, how long did it take to apply primer? And I am so impressed with the work that was done with the ramp. It looks so solid now! Well done!!
ReplyDeleteThis is really cool! It's great to know how much work can be DIY'ed with the right knowledge and a little patience.
ReplyDeleteHiring the right professionals to help makes all the difference!
DeleteGreat trailer makeover! :)
ReplyDeleteomg you are amazing to do all that (Even with help). It looks great but this is why i bought new. I just couldnt even fathom some of the older trailers i looked at. And I Needed lighter trailers too for my truck. Great job though!! That ramp OMG!
ReplyDeleteYeah, shopping was anxiety ridden but blah, financially I couldn't do new and afford a (used) truck. Freedom vs. Finances...Freedom on a budget! Lol
DeleteThe Boyfriend and I completely stripped down and redid a straight haul trailer I purchased for super cheap. It was a fun, but frustrating and very long-winded task haha. Glad you got yours all fixed up - it looks loads better!
ReplyDeletepart 1: http://twoandahalfhorses.blogspot.ca/2015/10/operation-trailer-restoration-part-1.html
Part 2: http://twoandahalfhorses.blogspot.ca/2015/11/operation-trailer-restoration-part-2.html
Part 3: http://twoandahalfhorses.blogspot.ca/2015/12/trailer-restoration-part-3.html
Part 4: http://twoandahalfhorses.blogspot.ca/2015/12/trailer-restoration-part-4-and-mini.html
Part 5: http://twoandahalfhorses.blogspot.ca/2016/01/trailer-restoration-part-5-finale.html
Ho-ly CRAP. Y'all did some fucking WORK. It looks absolutely AMAZING! Total revamp. I'm so impressed. And at a great cost, too! How lucky to know people with that skillset. Thank you so much for sharing this!
DeleteI bought one, started working on it, realized I don't know enough to do it myself/it was more work than I wanted to do haha, also realized it was a horsey sweat shed and sold it to some other people for what I paid for it. Win?
ReplyDeleteHUGE WIN!!!
DeleteMy husband and I are doing a very similar thing right now!I should blog post about it. It actually looks very similar to your trailer. Awesome to know your project went well and it's doable. ;-)
ReplyDelete